1. Body parts are a language for precise location
Human body parts can be learned as a list, but healthcare work requires more than recognition. A useful description identifies a region, its side, its surface, and its relationship to nearby structures. The same vocabulary supports examination, imaging requests, positioning, specimen labeling, and communication with patients. A small improvement in location language can remove a large ambiguity: “left posterior elbow” tells a colleague much more than “the arm.”
This guide treats body regions as a connected map. The map is useful at several scales, from an entire limb to a small surface landmark. Start with what can be observed, then add the appropriate anatomical term. Keep a person’s reported sensation separate from the structure that might explain it. Naming a location does not establish which tissue is affected or why a symptom has occurred.
2. Establish a common reference position
Standard anatomical position uses an upright body with the face directed forward and the palms facing forward. Right and left belong to the person being described. In an anterior illustration, the person’s right therefore appears on the observer’s left. These reference directions remain meaningful when the person lies down or turns a limb during an examination. [OpenStax: anatomical terminology]
Try describing a small mark on your own wrist while the palm faces upward, then downward. The physical mark has not moved to a different anatomical surface because you rotated the hand. This exercise helps distinguish the reference map from a temporary posture. When documenting an examination, add the actual posture when it matters: anatomical location and examination position answer related but different questions.
3. Connect the head, neck, trunk, and limbs
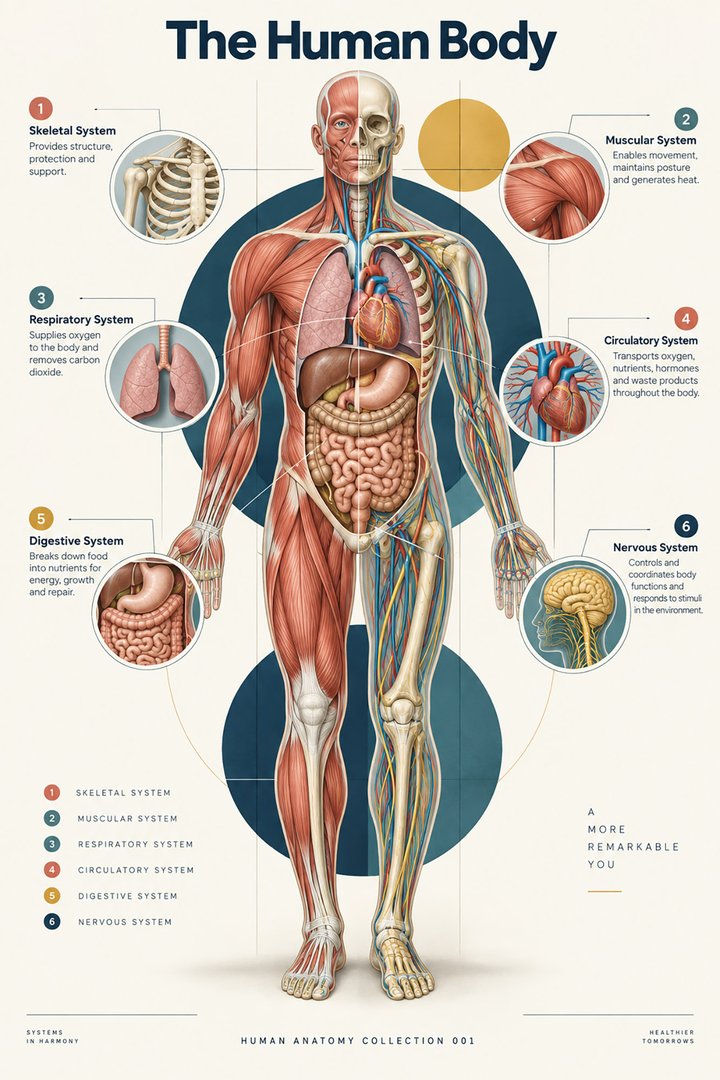
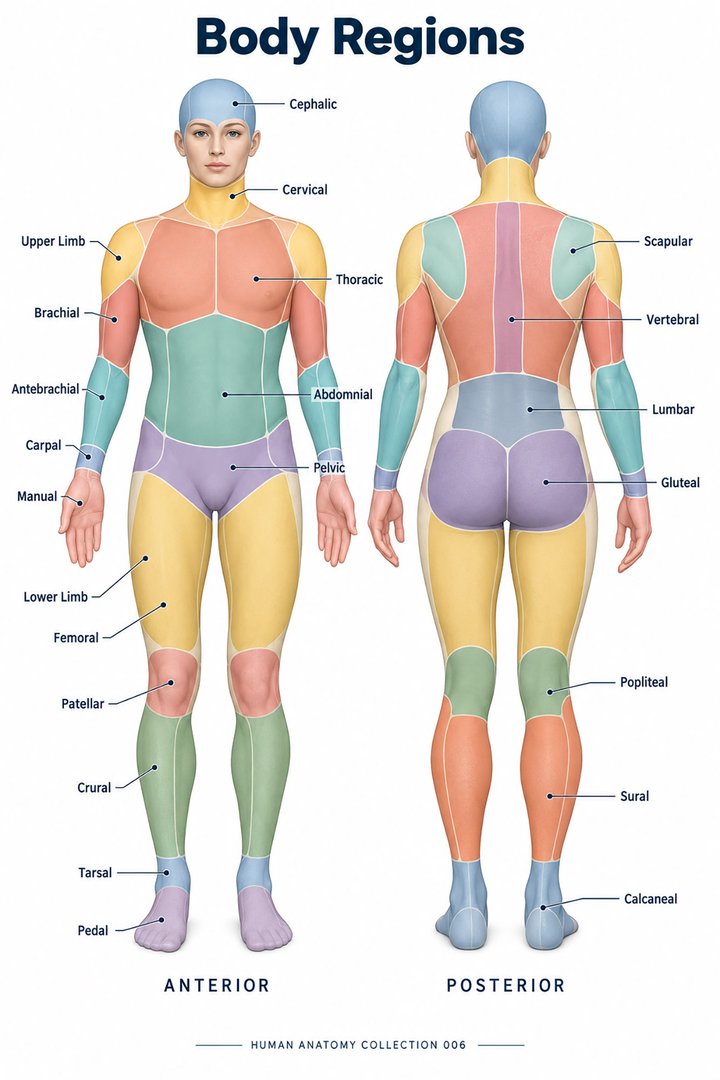
A regional approach groups the body into head, neck, trunk, and limbs. The trunk includes thoracic, abdominal, and pelvic regions. Surface regions are not interchangeable with internal organs: the chest wall is not the lung, and the abdomen is not the stomach. Each region contains multiple tissues and overlapping structures. Systemic anatomy follows a system across these regions, whereas regional anatomy examines their local relationships. [NCI SEER: structural organization of the body]
In a teaching session, choose a shoulder region and ask learners to name different tissue categories that can occupy it. Then ask them to identify the regional term without guessing which tissue causes an example complaint. This separates useful anatomical orientation from an unsupported interpretation. The distinction is especially valuable when several professionals share a description but have different examination responsibilities.
4. Arm, forearm, thigh, and leg have specific meanings
In anatomical usage, the arm or brachium lies between shoulder and elbow; the forearm or antebrachium lies between elbow and wrist. The thigh lies between hip and knee, while the leg or crus is the region between knee and ankle. Everyday speech often uses “arm” or “leg” for the entire limb, so a clinical conversation should clarify the intended region. [OpenStax: anatomical terminology]
A patient may reasonably say “my leg hurts” while pointing to the thigh. Record the clarified site instead of treating ordinary language as an error. For student revision, cover the labels of a regional poster and identify the segment boundaries. Follow with a complete sentence describing the site. This exercise trains translation between accessible language and the precise vocabulary needed in a record.
5. Directional words describe relationships
Superior and inferior compare position toward the head and feet. Medial and lateral compare position toward and away from the midline. Proximal and distal are especially helpful along limbs, comparing position nearer to and farther from the attachment. Superficial and deep describe distance from the surface. These terms are relational: a structure can be deep to one tissue and superficial to another. [NCI SEER: anatomical terminology]
Always name the relationship’s reference. “Distal” alone leaves the reader asking distal to what. In an educational example, a site can be described as distal to the elbow and proximal to the wrist. For depth, compare skin with an underlying tendon and the adjacent skeleton rather than treating “deep” as a universal measurement. A clear relationship is often more useful than an isolated adjective.
6. Surface landmarks support shared orientation
The umbilicus, patella, and olecranon are recognizable landmarks that help orient a regional description. A landmark gives a common starting point, but it is not a guarantee that every underlying structure has a fixed relationship in every person. Body size, posture, tissue thickness, and anatomical variation affect what a surface view reveals. A teaching model makes some relationships conspicuous by exposing or exaggerating them.
For practice assistants and hospital staff, a body chart can support a patient’s indication of a site. Ask the person to point again if the description remains uncertain, and preserve laterality in the record. For physicians explaining an investigation, a landmark can introduce the region before discussing deeper anatomy. In eldercare, use the agreed documentation system so that subsequent colleagues can locate the same observed area.
7. Planes and sections add depth to a regional map
Three principal orthogonal anatomical planes are sagittal, coronal, and transverse. They divide a three-dimensional body in different directions. Oblique sections add other perspectives. A surface picture and an internal section are therefore different kinds of maps, even when both show the same region. Imaging must retain orientation information because a cropped section can lose the visual cues present in a whole-body picture. [NCI SEER: anatomical terminology]
Place a simple drawing of a limb beside a cross-section. Ask what the section reveals that the surface drawing conceals, then ask which directional relationship remains valid in both. This comparison is more productive than expecting every structure to appear identical. An anatomical term should travel across views; the picture used to represent that term will change with the plane and depth.
8. Four quadrants and nine abdominal regions
Two common abdominal mapping conventions use four quadrants or nine regions. These are classification schemes, not counts of organs. The quadrant names retain the person’s side: right upper, left upper, right lower, and left lower. A nine-region map provides another subdivision for teaching and description. Neither grid determines the cause of pain or the exact location of every organ in an individual. [OpenStax: anatomical terminology]
When transferring a finding between forms, check which scheme each form uses. Avoid changing a precise reported site into an assumed organ name. A poster can help explain where the quadrants lie, while an examination and relevant investigations establish clinical meaning. The graphic below compares only the number of map divisions; it does not suggest that the schemes divide the body into equal biological units.
9. Latin names clarify important regional distinctions
Caput names the head, collum the neck, thorax the chest, and abdomen the abdomen. Manus and pes identify the hand and foot. Brachium, antebrachium, and crus retain the segment distinctions described above. Learn Latin names with an image and a relationship rather than as a translation exercise alone. The scientific vocabulary also contains Greek-derived expressions; not every medical word is Latin. [FIPAT: Terminologia Anatomica, second edition]
A useful revision card contains three items: the English term, the Latin term, and an example sentence. Add a sketch showing the boundary that gives the name meaning. This makes vocabulary usable during practical teaching and prevents neighboring terms from becoming interchangeable. When communicating with patients, use ordinary English first and add the technical term when it helps explain a report or procedure.
| English | Selected Latin |
|---|---|
| Head / neck | Caput / collum |
| Upper arm / forearm | Brachium / antebrachium |
| Hand / foot | Manus / pes |
| Leg between knee and ankle | Crus |
10. Compare illustrations with a real teaching object
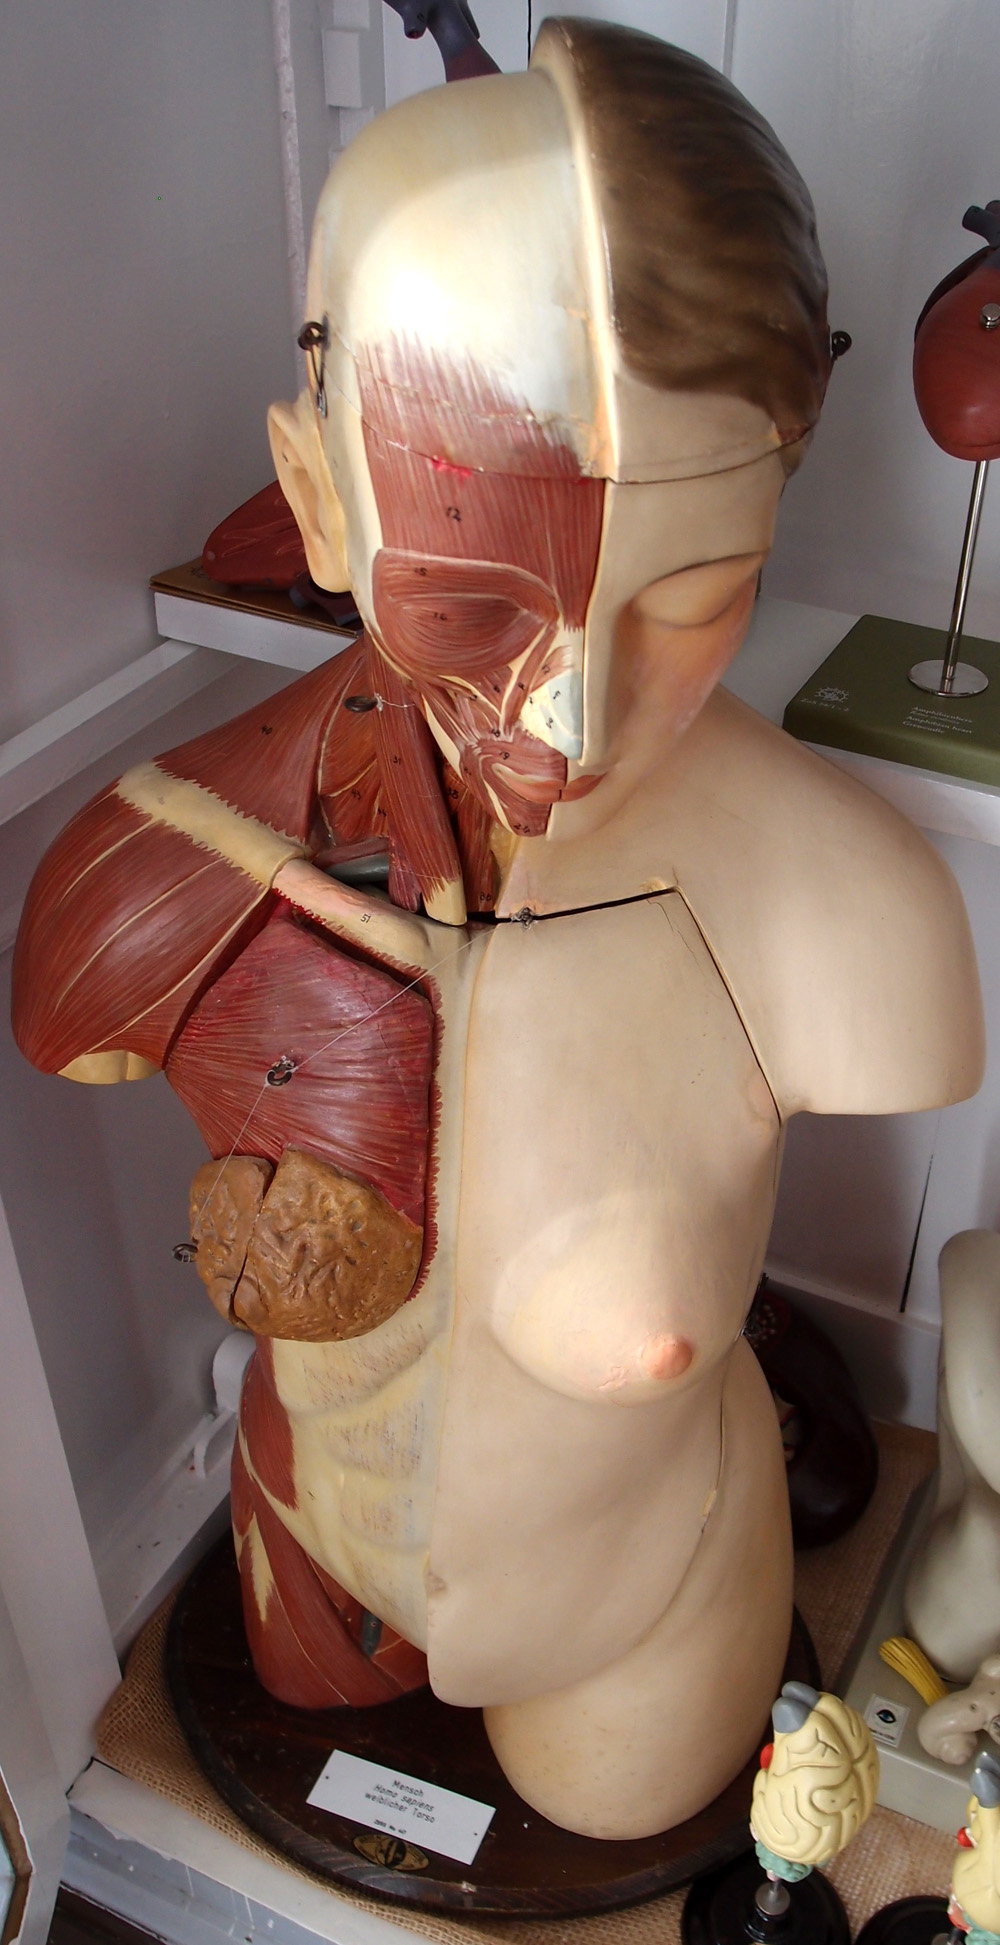
The photograph below records an actual anatomical torso model. It is a real photograph of a manufactured representation, whose exposed layers and colors were chosen for teaching. It should not be described as a photograph of natural tissue. Compare its visible neck, shoulder, chest, and abdominal regions with the featured regional poster, then identify which layers the model has deliberately revealed.
End a study session by giving one clear regional description that another learner can locate without seeing your gesture. Include side and surface, then check the result together. If you disagree, identify whether the problem concerns vocabulary, orientation, or an assumed underlying structure. This simple exchange turns a body-parts list into a practical communication tool for medical students and healthcare teams.
Sources and image credits
Sources checked on 8 October 2026. Numerical examples, anatomical classification counts, and research estimates are identified separately in the text.
- FIPAT: Terminologia Anatomica, second edition
- OpenStax: anatomical terminology
- NCI SEER: structural organization of the body
- NCI SEER: anatomical terminology
Explanatory prose and simplified SVG graphics are original. Photographs retain their stated Creative Commons licenses; creator and source links appear beside each image. Catalog artwork is educational and decorative; no clinical authorship or peer-review credential is claimed.